Diecast Car Photography: How to Build a Mini Car Studio With Halumin-C
The studio was half dark, a phone was clamped overhead, and a little white Honda NSX was lying on its side in a holder I’d made just for this job. It’s the kind of model diecast collectors talk about with real affection, and I’d bought it on the strength of that reputation. A few of our Kickstarter backers are deep into diecast collecting, and they’d been asking the same question: can a coin lighting device do justice to a car? So I gave the NSX the treatment a real car gets in a studio.
Diecast car photography is really small-product photography with a big-car problem: glossy paint, deep-set rims, dark tires and fine panel lines all fight for the light. With Halumin-C, the halo wraps around the model the same way a full-size studio wraps light around a real car. The Halumin-C is patent pending and combines three lighting systems in one device: axial, tone and open cylindrical. In the video below I work through side, top-down and underside shots, then move to a turntable and add fog for a reveal.
Key Takeaways
Set the car on its side so the halo wraps light around it the way a real car studio does.
Twist the halo to choose where the highlights land, then add axial lighting to fill shadows and reveal deep-set rims.
The tone lighting adds a harder edge that brings out texture such as carbon fiber.
Light the underside too: candy and opalescent finishes come alive under axial plus high-angle halo lighting.
Use an elevated turntable for 360-degree videos, and add fog for drama.
This is one of my new studio demos. I’m using them to dial in the setup before I start doing live demos with people in front of me, so you’ll catch me switching camera angles as I go. The subject is a white NSX model (a Kaido House x Mini GT 1:64 NSX “Kaido Works V2”), shot on a phone at 48 megapixels, held steady on a ULANZI MT-44 phone tripod.
Why Diecast Cars Are Hard to Photograph
Real cars are usually shot under huge overhead softboxes, with more lighting wrapping around the edges to trace the body lines. A model is the same shape at a tiny scale, so ordinary room light gives you flat paint, black holes where the wheels are and glare on the windows. Halumin-C’s ring-shaped halo is basically that car studio shrunk down. Its top half acts like the giant overhead softbox, and the bottom half grazes the tires and lower lines.
A Little History of the Car on the Table
The NSX started life as Honda’s mid-engine supercar. It launched in 1990, and engineers tuned it with help from Ayrton Senna (Honda heritage; overview). Its low, wide glasshouse and clean flanks are exactly the kind of lines a wraparound light is made to trace. My model is the Kaido House x Mini GT 1:64 NSX “Kaido Works V2” in white with a black top (Amazon). Mini GT’s reputation for detail is why I picked it for this test.
As an Amazon Associate, Halumin earns from qualifying purchases.
How to Photograph a Diecast Car With Halumin-C: Step by Step
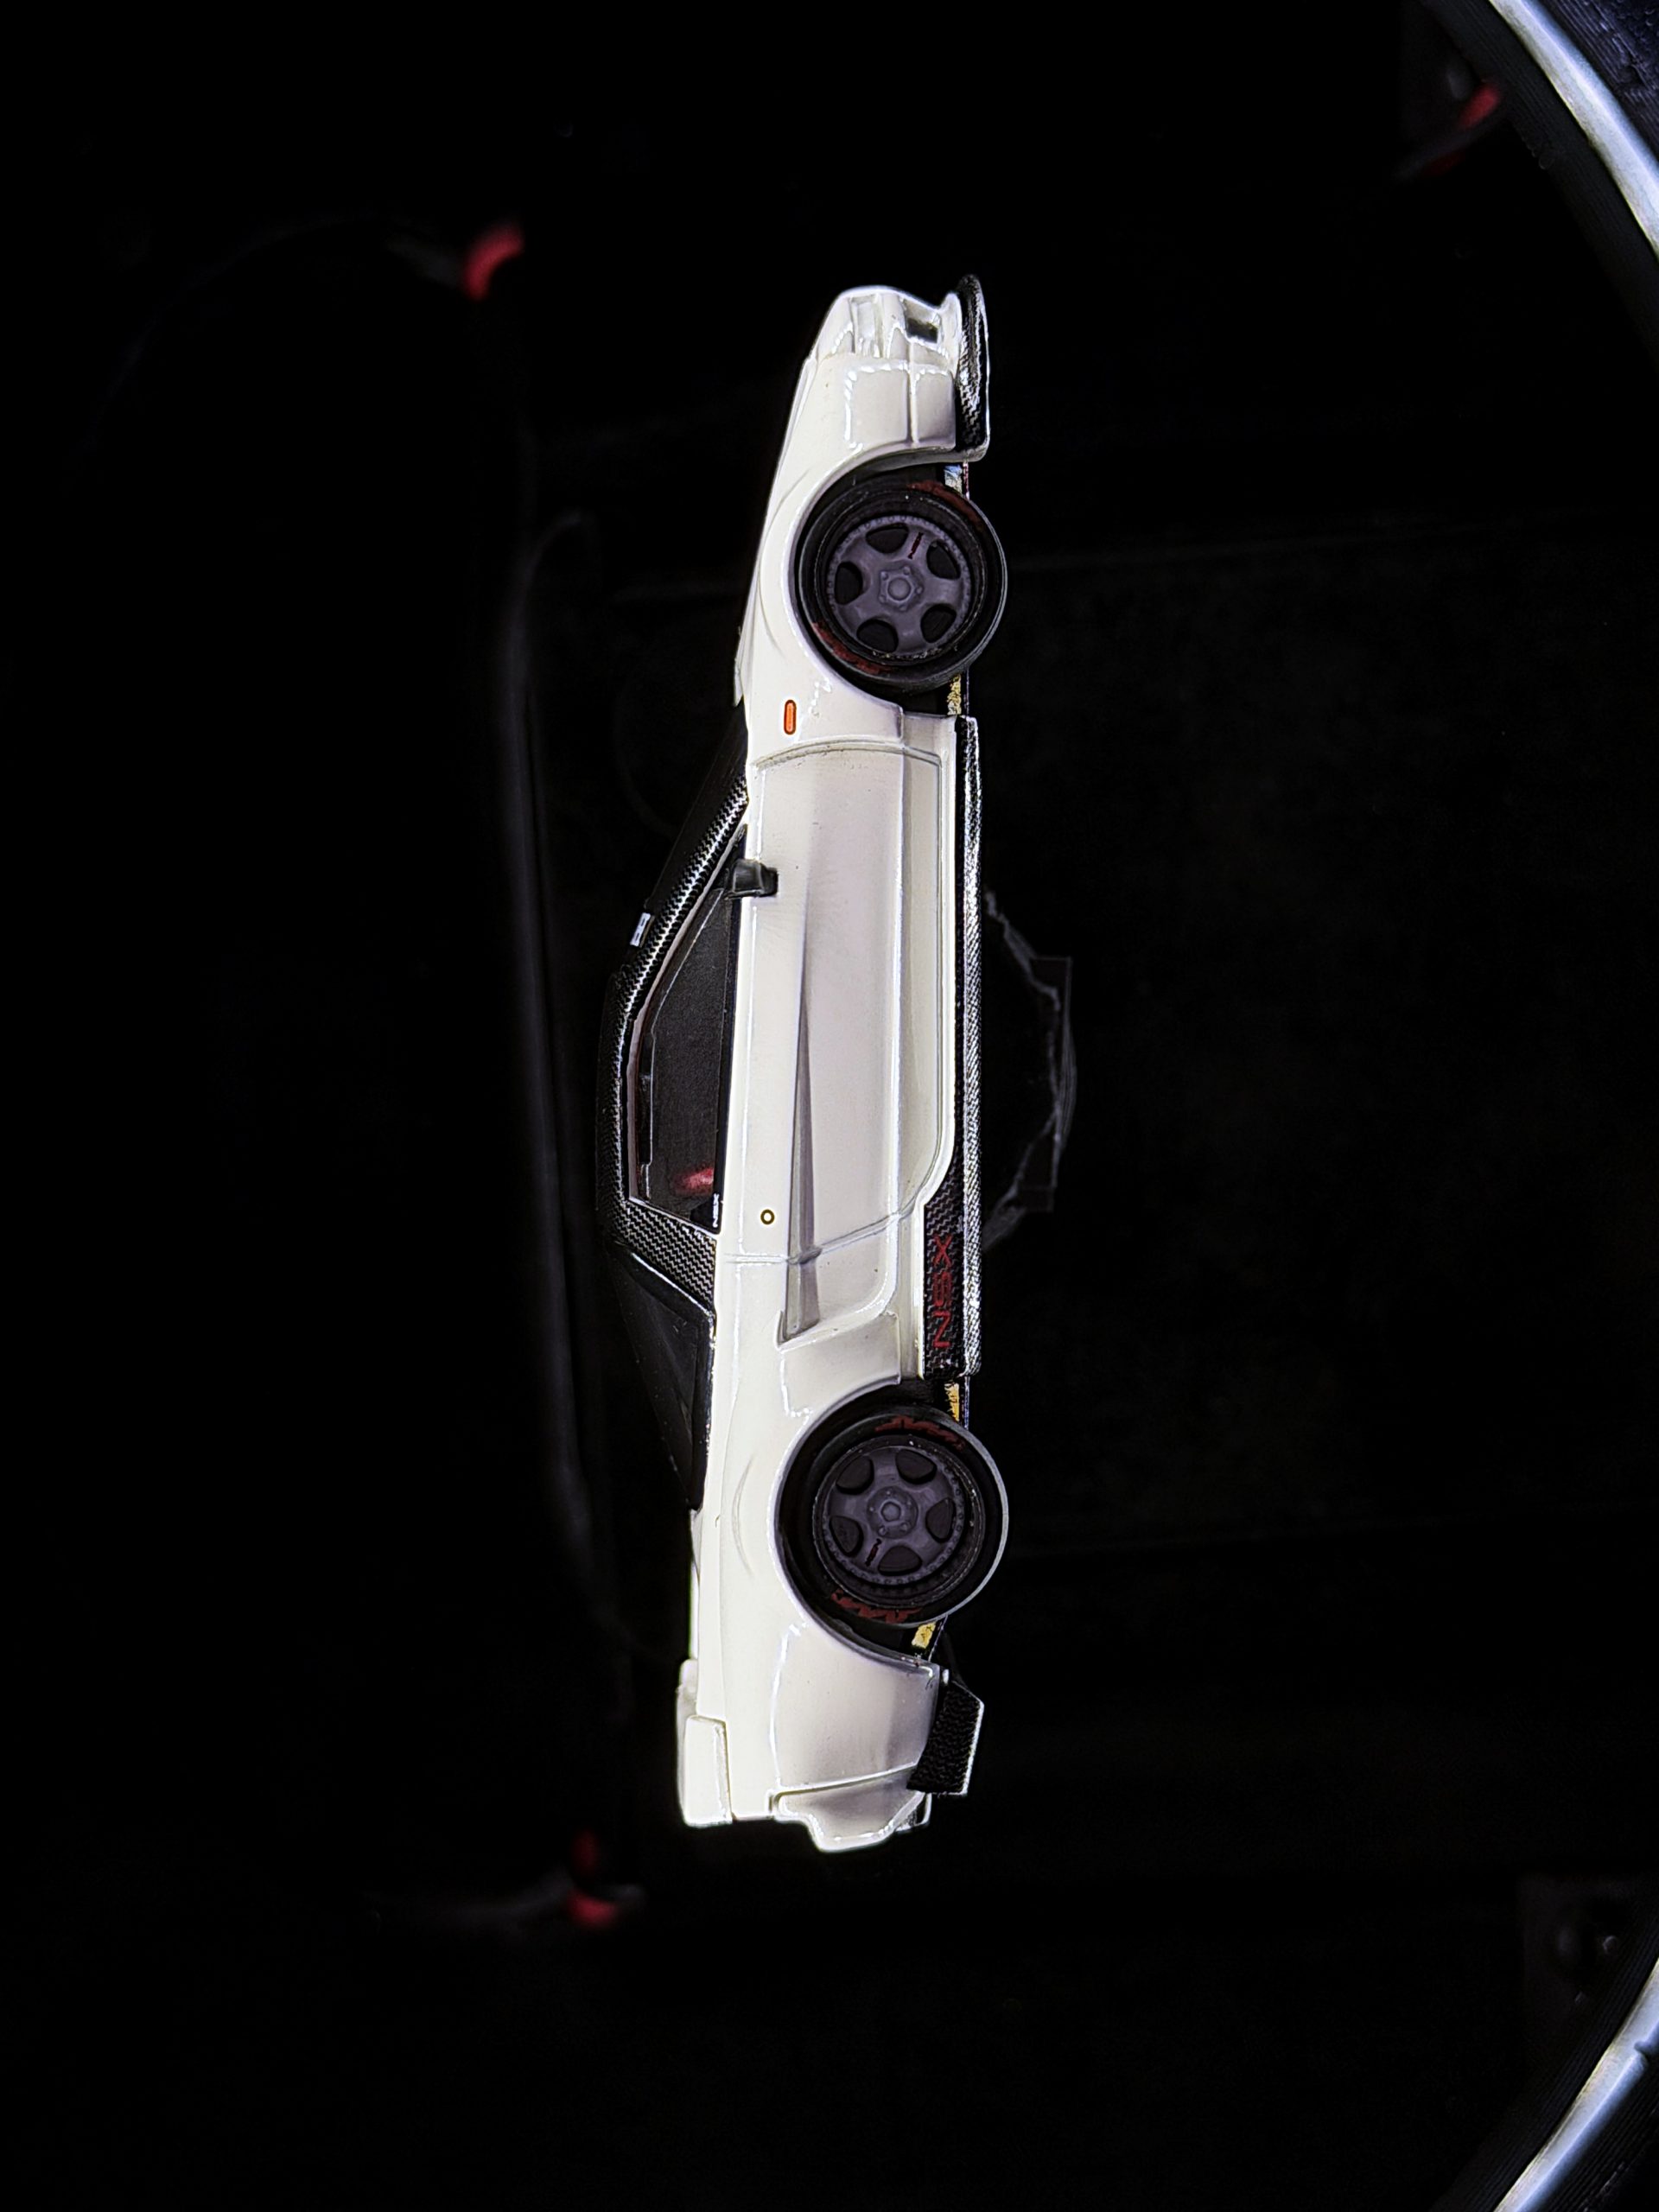
Mount the car on its side. A simple holder (mine is a modified coin pedestal) keeps the model steady and perfectly level.
Set the angle and lock exposure. Center the car, tap to focus, lock auto exposure and pull it down for a clean dark background. Shoot at your phone’s highest resolution (I used 48 MP).
Twist the halo to pick your look. I start with the A and B sides of the halo at about 40%. Rotate the halo to move the highlight balance from top to bottom.
Add axial lighting. Bring it up to fill the shadows, reveal the tires and lay an even sheen over the paint.
Try a high halo angle. The bottom of the ring grazes the tires and dark parts, and the top catches the front of the car.
Shoot top-down and underside views. Buyers want several angles, so take every one.
Deep rims. This model’s rims sit unusually deep. With the axial lighting off, the tires almost disappear. Turn it on and you decide exactly how much of the wheel shows.
Moody single-source looks. Use one strong bottom light with a sliver of the top showing, then add axial lighting only where you need fill.
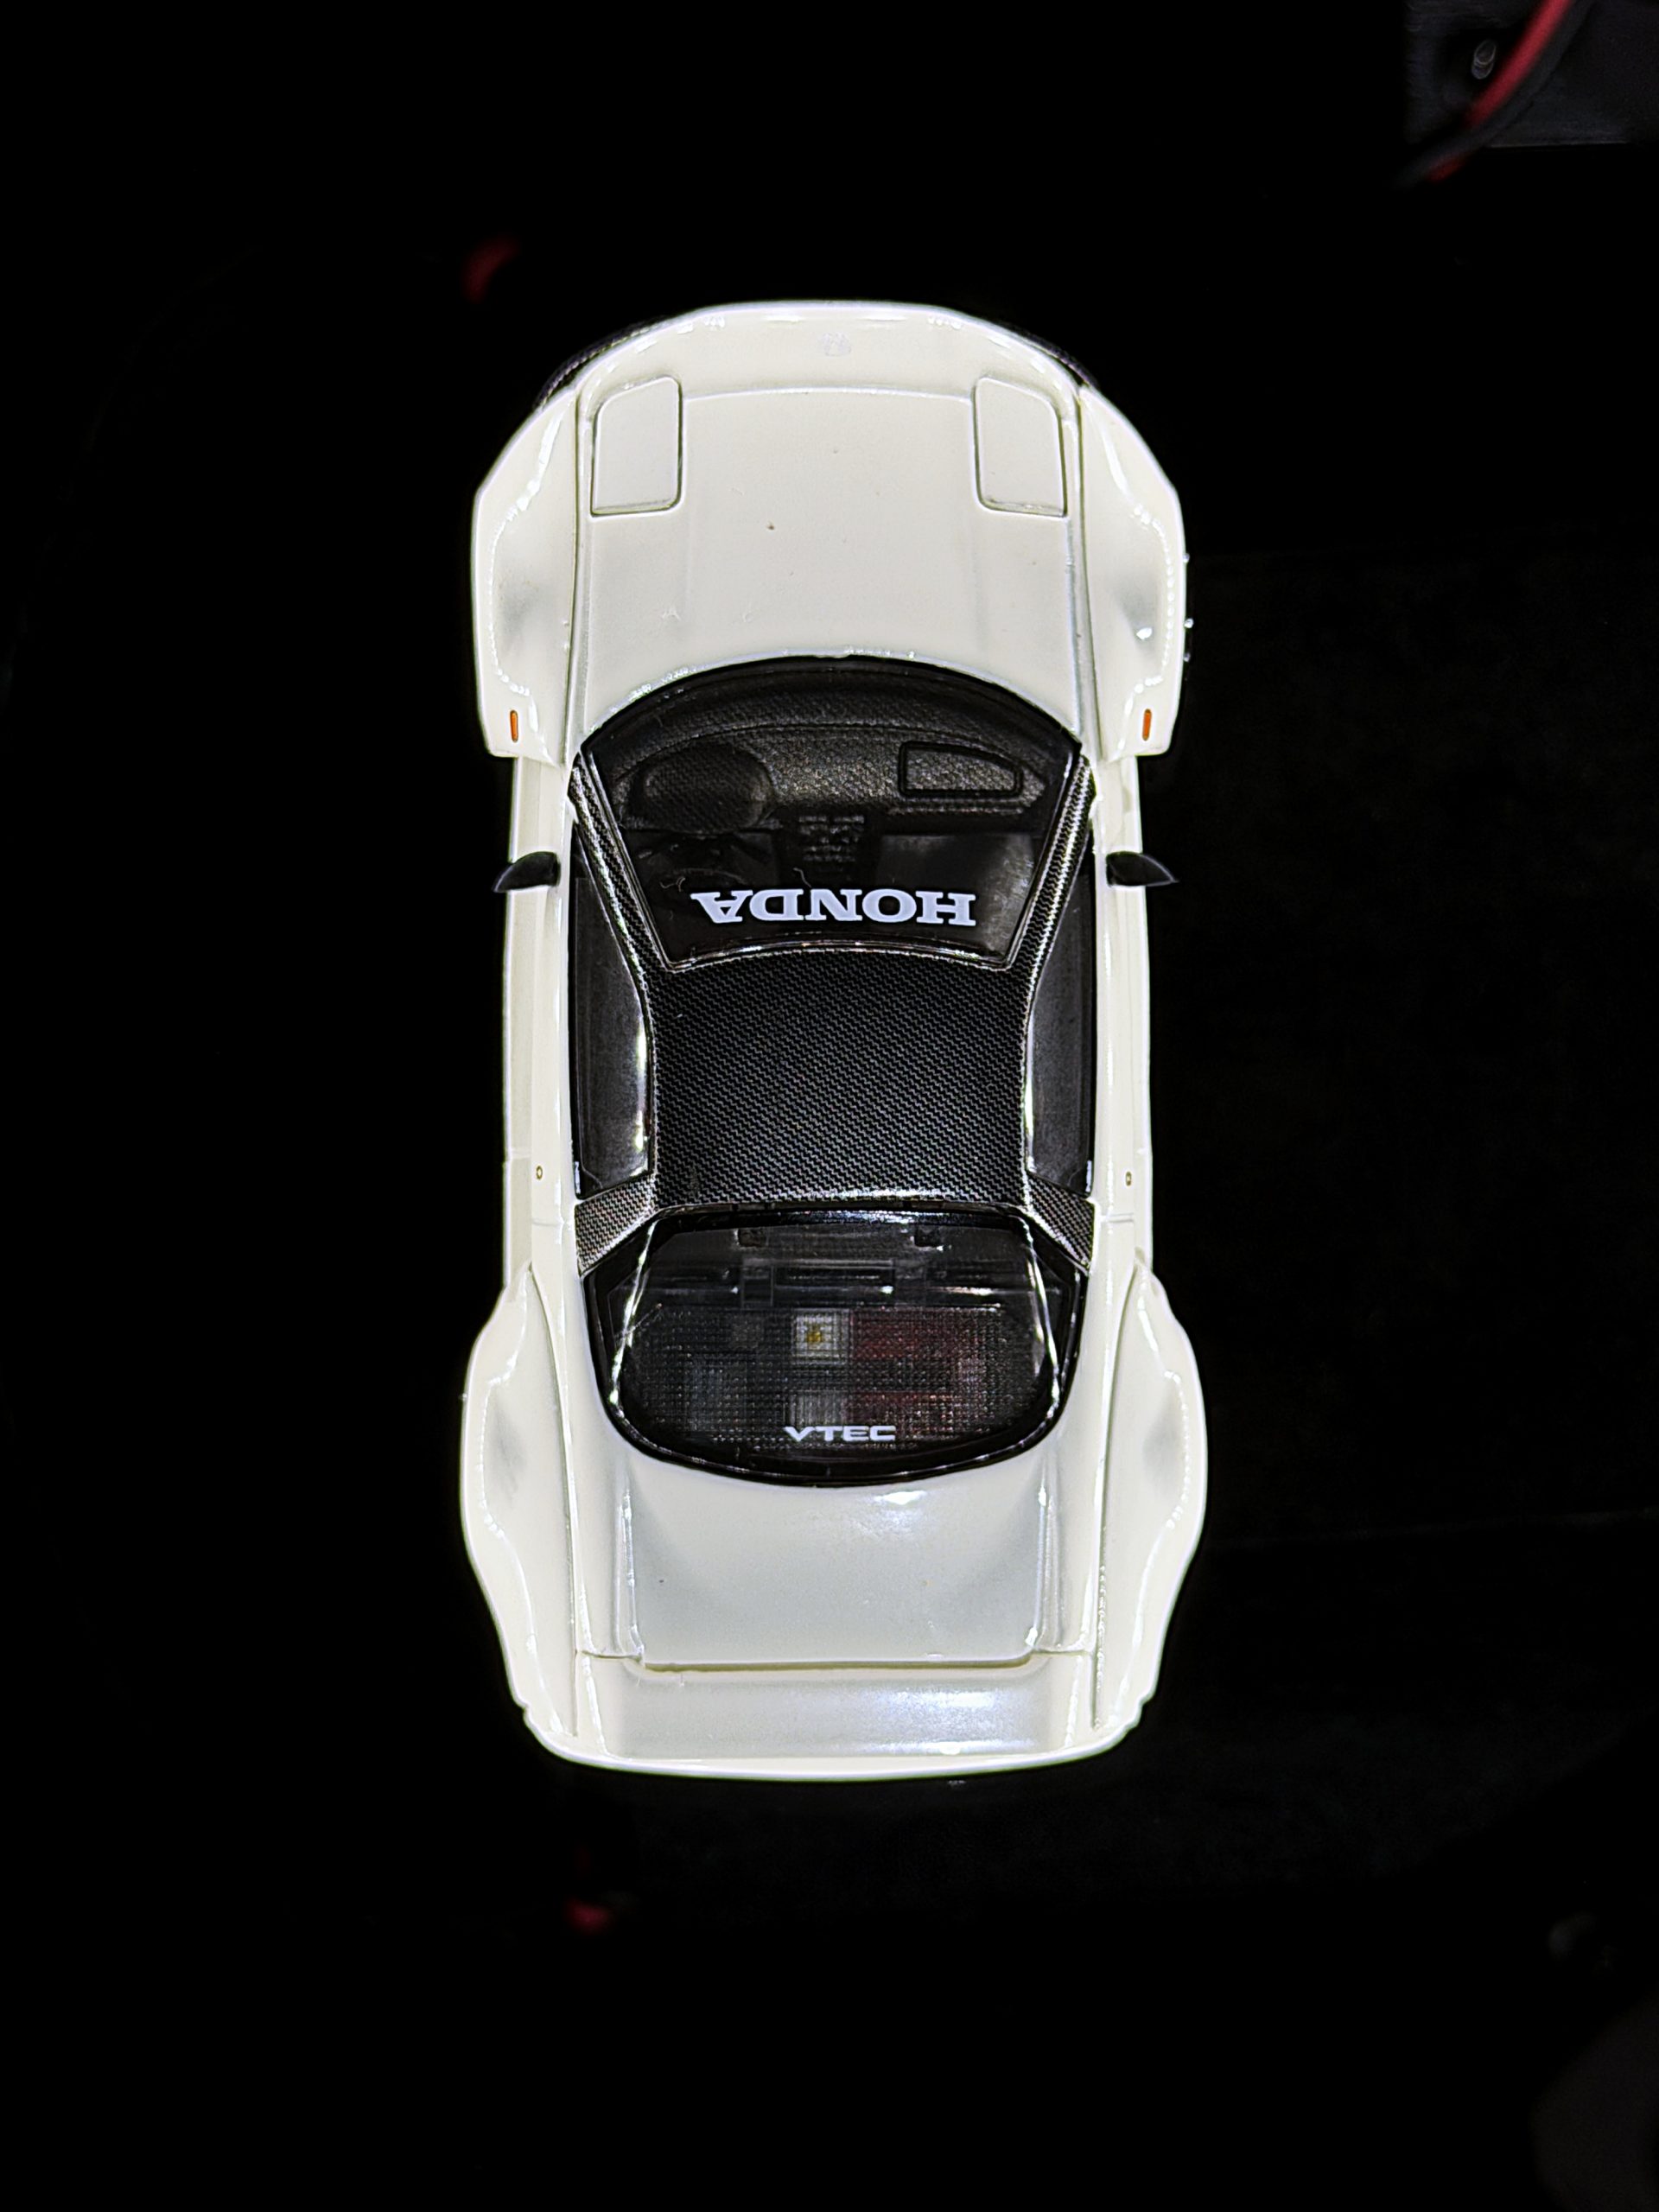
Top-down. A level halo lights the whole roofline. Axial lighting picks up the hood and roof and puts a little shine on the front and rear glass.
Tone lighting. It gives a harder edge that makes the carbon-fiber roof texture far more visible. Watch out for hot spots on glossy panels.
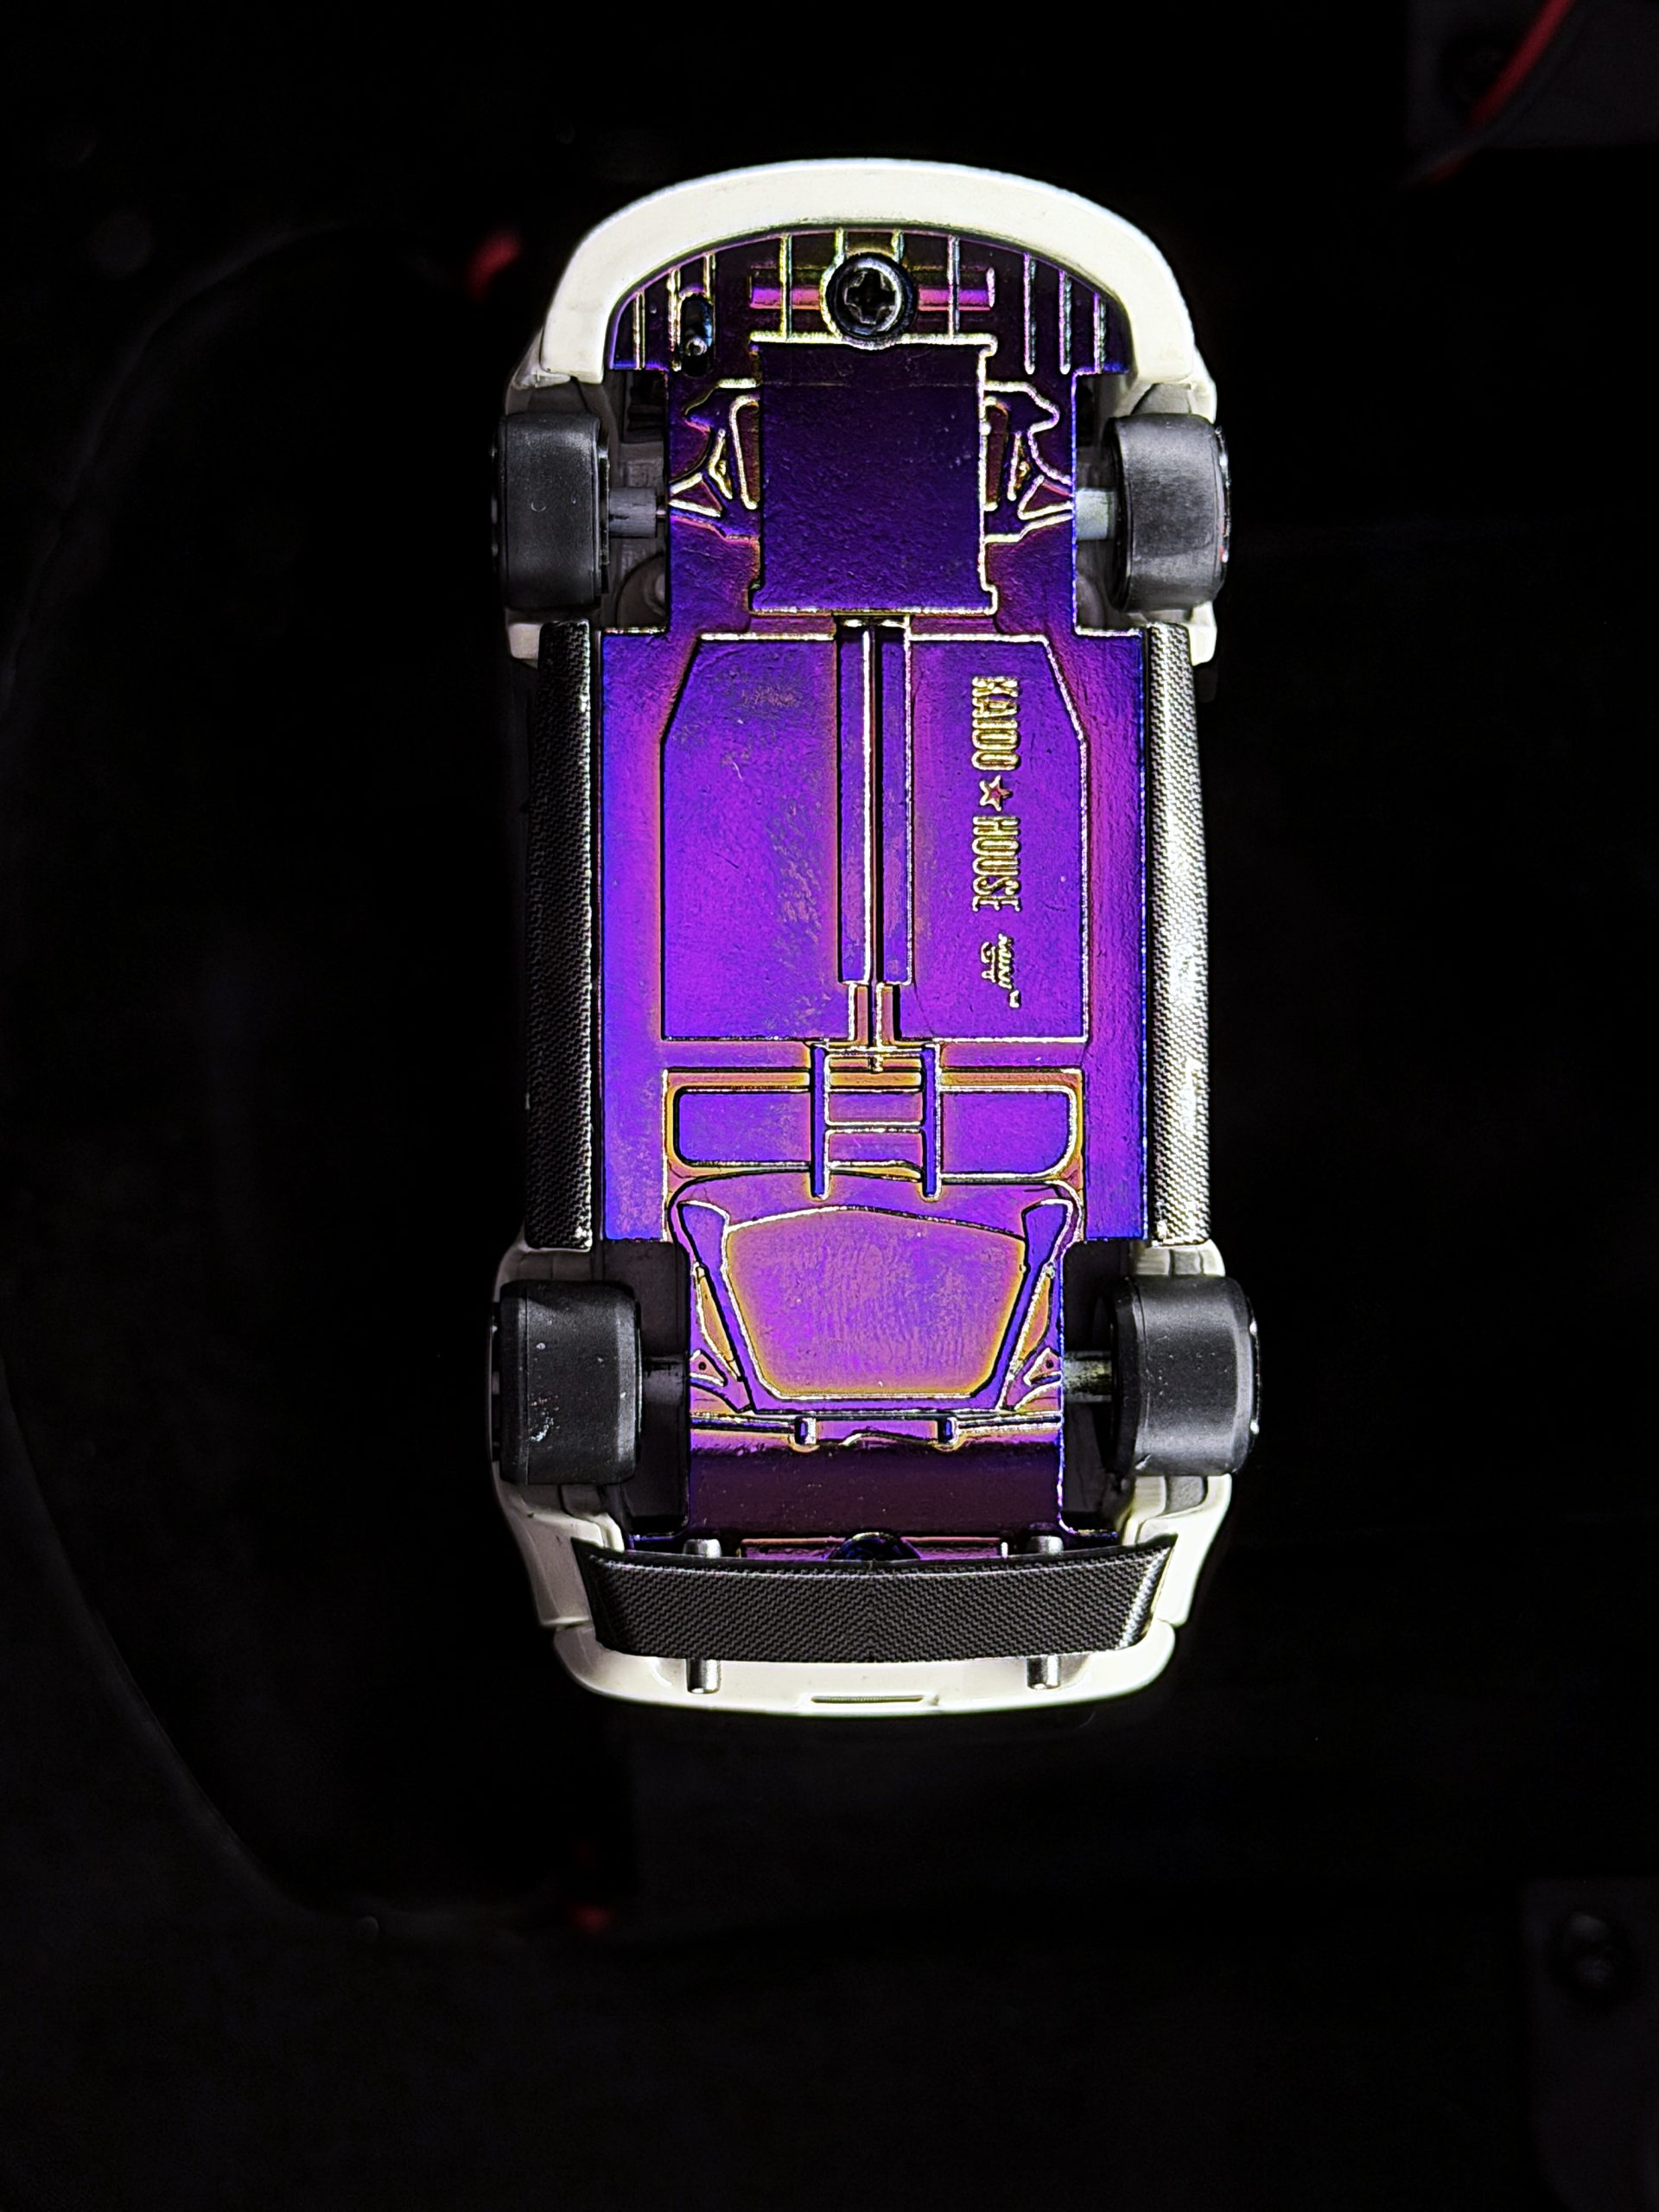
The underside. This one surprised me. The base has a candy, opalescent finish, like a toned coin. Axial lighting plus one high-angle half of the halo brings out the purple sheen and all the cast detail you’d never notice in normal light.
Turntable Videos and a Little Fog
For 360-degree clips, I swap the pedestal for an elevated turntable I made for this job. Lighting the top half of the halo gives the soft overhead wash a real car studio gets from a giant softbox. The bottom half lights the undercarriage. The turntable lighting on its own throws hard spots and moving shadows, which looks great in rotation.
Then the fun part: a small COLBOR CF3 V2 handheld fog machine. It works on the same idea as a vape pen and turns fog on and off at the press of a button. A puff behind the car on the turntable makes an instant reveal shot.
Tip: Lid On First
Shooting with the lid on is the default. It keeps room light out, so you get the same clean results in any room without dimming the lights. I took the lid off here only so you could see the setup. If you work lid-off, dim the room for the best contrast.
Halumin-C: Built for Coins, Great for Diecast
Halumin-C is a patent-pending lighting device for coins and other small, high-detail objects. It has a rotating halo with independent A and B sides, axial lighting, tone lighting and turntable lighting, and a built-in turntable, all run from one controller. Diecast cars, jewelry, minerals and miniatures all benefit from the same control. (For larger subjects, see our patented Halumin H18, U.S. Patent No. 12,181,778.)
Can Halumin-C Photograph Diecast Cars, or Is It Only for Coins?
It handles any small, high-detail object. A model car fits on a holder or the elevated turntable, and the halo wraps light around it the way a car studio does.
What Angle Is Best for Diecast Car Photography?
Lay the car on its side for profile shots so the halo traces the body lines. Then add top-down and underside angles, especially if you’re selling.
How Do I Show Deep-Set Rims and Dark Tires?
Add axial lighting. It fills the wheel wells, and you can dial it up or down to control how much of the rim shows.
Can I Make 360-Degree Videos of a Model Car?
Yes. Put the car on an elevated turntable, light it with the top half of the halo and record with your phone.
Is a Fog Machine Safe for Product Shots?
Small handheld foggers use a glycerin-based fluid. Use them in a ventilated space, keep them upright and keep fog away from electronics.
Do I Need a Dark Room?
No. With the lid on, Halumin-C blocks room light. Dimming only helps when you shoot lid-off.
Summary: A Real Car Studio, Scaled Down
Diecast car photography gets easy once you light the model like a real car: a wraparound halo, axial fill for the wheels, tone lighting for texture and a turntable for motion. For more small-subject ideas, see Halumin-C, toy photography with Halumin and black-on-black 3D-printed toy photography. Questions? Leave a comment on the video and I may answer it in the next one.
Get Halumin-C
 Skip to content